
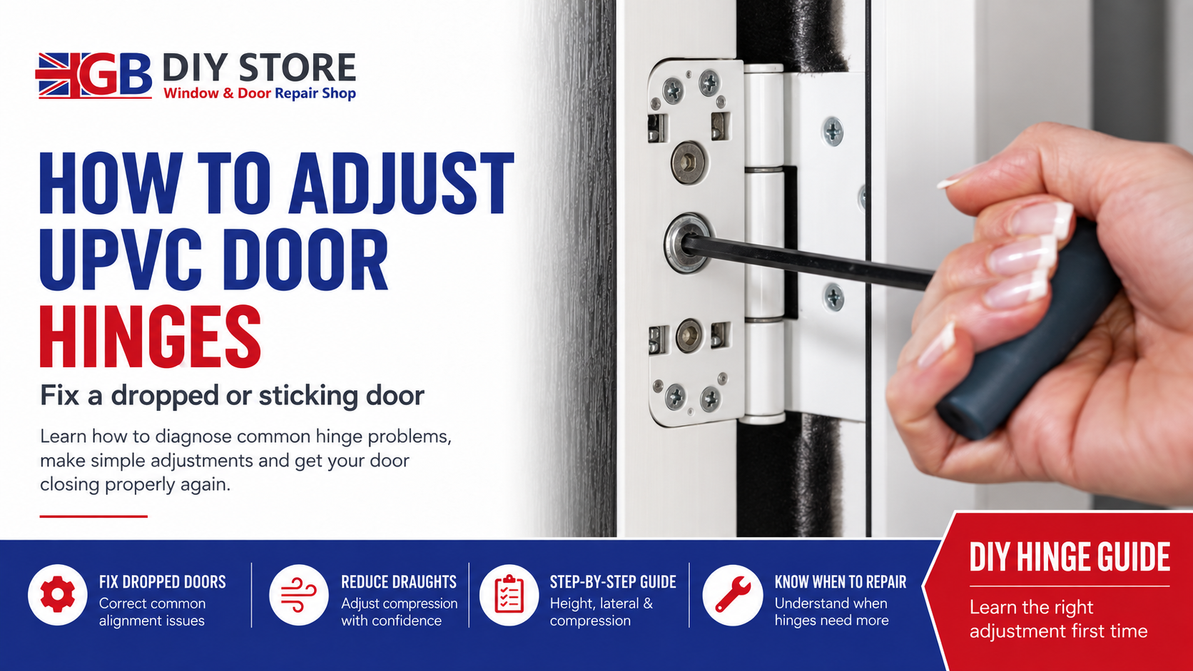
How to Adjust uPVC Door Hinges: Fixing a Dropped or Sticking Door
If you know how to adjust uPVC door hinges, most of the faults that make a door feel past its best turn out to be a five-minute job with a tool like a hex key. A door that catches on the frame, drags at the bottom corner, needs a shove to lock, or whistles on a windy night is usually a door that has moved a few millimetres out of position, not a door that needs replacing.
The good news? Almost every uPVC and composite door hinge fitted in the last twenty years was designed to be adjusted in place, with the door still hanging. Here's how to work out what yours is doing wrong and which screw actually fixes it.
First, Work Out What the Door Is Actually Doing
Adjusting the wrong axis is the usual reason people give up and decide the door is beyond help. Spend a minute diagnosing before you touch anything. Close the door slowly and watch where it makes contact.
- Catching at the lower locking-side corner, or the handle needs a hard lift to engage: the door has rotated out of square rather than simply dropped. Often it isn't the corner of the door touching at all. The rollers or cams on the multipoint lock are sitting too low and catching the bottom edges of their keeps. The fix is opposite lateral adjustments, not height.
- Rubbing along the top or bottom edge: check the frame is square before you assume the door is at fault, then check whether the door itself has twisted out of square.
- Draught, whistling, or a door that rattles slightly in the wind: compression, but note where the draught is. A draught on the hinge side is corrected at the hinges. A draught on the lock side is controlled by the multipoint locking points and keeps, not by the hinges at all.
- Uneven gap down the closing edge, wide at the top and narrow at the bottom or the reverse: lateral adjustment.
- The door closes and locks perfectly, but the letterplate or handle looks off-centre: leave the hinges alone; that's a fitting issue rather than an adjustment.
A useful trick for compression problems: close a sheet of paper in the door and pull. If it slides out with no resistance at one point on the frame but grips elsewhere, that's where the seal isn't being met.
One more thing worth knowing before you start: temperature moves doors. A dark uPVC door in direct sunlight expands and contracts through the day, and over enough summers that repeated movement gradually shifts hinge settings. If a door that was fine in spring has started catching by August, it hasn't necessarily worn out. It has moved, and it can be moved back.
The Three Adjustments and What Each One Does
Depending on the hinge, you'll have either two or three adjustments available. A 3D hinge normally gives you lateral, height and compression as three independent adjustments. A 2D hinge gives you two of the three, and which two varies by pattern, so check yours rather than assuming. Our guide to the types of uPVC door hinges covers how to tell them apart.
- Compression pulls the door towards the frame or lets it sit further out. This is your draught and rattle adjustment on the hinge side. Sealing on the lock side is set by the locking points and keeps.
- Lateral moves the door across, towards the hinge side or away from it. This is your uneven gap adjustment, and, used in opposite directions at the top and bottom, it is also how you rotate a door back into square. That makes it the main repair for a dropped locking side.
- Height lifts or drops the whole door. It helps where clearance is tight evenly all round, but it will not correct a door that has rotated out of square, and it is not the fix for a dropped locking-side corner.
Before You Touch a Screw
- Work with the door closed unless the adjustment specifically calls for it to be open, so the door is supported by its own frame.
- Pop the caps off the hinges. They're usually a friction fit and lift off with a thin flat screwdriver, though some clip at one end.
- Find out which key your hinges take before you start rather than halfway through. Many take a hex key, but several patterns need a manufacturer's tool, and rounding off an adjuster turns a simple job into a hinge replacement.
- Make one adjustment at a time, a quarter turn at a time, and test the door after each. Adjusting two axes at once means you'll never know which one worked.
- Mark your starting position with a pencil line so you can always get back to where you began.
Adjusting Compression: Fixing a Hinge-Side Draught
Compression is usually the adjuster on the face of the hinge body, the one you can see with the door closed. Turning it moves the door in towards the seal or back out again.
Work down the door one hinge at a time, a quarter turn each, then close it and check. You're aiming for a door that meets its seal evenly all the way round and closes with firm pressure. Overtightening is a real risk here: a door crushed hard onto its seal will feel solid on day one and will have flattened the gasket by the end of the year, at which point you're buying replacement door seals as well.
If the door still draughts once compression is even, the seal itself has probably gone hard. That's a separate job and a cheap one. And if the draught is along the lock side rather than the hinge side, the hinges aren't the answer at all: that edge is pulled in by the locking points meeting their keeps, so it's the keeps that need looking at.
Adjusting Lateral Position: The Gap and Squareness Fix
Lateral adjustment shifts the door sideways in the frame. It's the fix when the gap down the closing edge tapers, wider at one end than the other.
Adjust the hinge nearest the widest part of the gap first. Small movements matter more than you'd expect here, so stay with quarter turns and keep checking the gap at the top, middle and bottom each time. When the gap runs parallel all the way down, stop, even if you feel you could keep going.
There's a second and more important use for lateral adjustment. When a door has rotated out of square, and the locking side has dropped, you correct it by adjusting the hinges in opposite directions: move the top of the door towards the hinge side and the bottom away from it. That rotates the slab back into square and effectively raises the locking side, so the cams and rollers enter their keeps cleanly again and the handle lifts without a fight. Work in quarter turns, test the handle after each one, and stop as soon as it engages smoothly.
Adjusting Height: What It Will and Won't Fix
Height adjustment raises or lowers the whole door in the frame, and it's worth being clear about what it won't do. It will not correct a door that has rotated out of square, which is the usual reason a locking side catches or a handle needs a firm lift. Raising the whole door in that situation moves the problem rather than curing it. Where height adjustment does earn its place is even, all-round clearance: a door that brushes the threshold along its whole width, for instance. On a 3D hinge, the height adjuster is normally hidden under the cap at the top or bottom of the pin.
Because you're lifting the weight of the whole door, this one is easier with a second pair of hands, or with a thin packer under the latch corner taking some of the load while you turn. Adjust all hinges by the same amount; otherwise you'll fix the height and create a lateral problem at the same time.
If your hinges offer no lateral adjustment, or you run out of range before the door is square, the answer on a glazed uPVC door is normally toe-and-heeling rather than swapping to a different pattern from our uPVC door hinges range. Toe-and-heeling means taking off the beads and repacking the glass unit inside the sash so the glass braces the door back into square. It works because the sealed unit is the most rigid part of the door. It's a fiddly job and worth handing to a glazier if you haven't done it before, but it's the correct repair rather than a workaround.
A Note on Brands and Tools
Hinge manufacturers don't standardise their adjusters, so it's worth knowing which make you're dealing with. Trojan, Avocet, Yale and Era all appear regularly on UK doors, and several of the 3D patterns need a dedicated key rather than a standard hex. Our Trojan adjustment tool for composite 3D door hinges covers the pattern we're commonly asked about.
If you can't identify the make, photograph the hinge with the cap off and send it over. Guessing at the tool is how adjusters get rounded. For more information, feel free to call our team.
H2: When Adjustment Won't Fix It
Adjustment has limits, and it's worth knowing when you've reached them rather than forcing another half turn.
- The hinge has visible play, or the door moves at the hinge when you lift the latch edge. This means the hinge is worn and needs replacing.
- You've run an adjuster to the end of its travel and the door still isn't square. On a glazed uPVC door, toe-and-heeling is the next step rather than a different hinge.
- The door closes correctly but won't lock, which usually means the keeps need aligning rather than the hinges. Our latches and keeps range covers the replacements if one is damaged.
- The frame itself is out of square, which adjustment can disguise but never cure.
Shop Hinges and Adjustment Tools with GB DIY
Whether yours needs a quarter turn or a new hinge altogether, we stock the parts. Browse uPVC door hinges, composite door hinges and the tools to adjust them, with same-day dispatch on orders placed before 3 PM.
Not sure whether you're adjusting or replacing? Give us a ring on 01623 622205 or send a photograph. We'll tell you exactly what you need.
FAQs
Why has my uPVC door dropped?
Doors drop because the weight of the slab gradually works the door out of square, and composite doors do it sooner because they're heavier. Temperature plays a part too, particularly on dark doors in direct sun. The repair is usually opposite lateral adjustments at the hinges, moving the top towards the hinge side and the bottom away, to rotate the door back into square. Simply raising it on the height adjusters does not correct the underlying misalignment. If the hinge itself has worn and has play in it, adjustment won't hold and the hinge needs replacing.
Which way do I turn the adjuster to pull the door tighter against the seal?
It varies by manufacturer, so test rather than assume. Make a quarter turn, close the door and check the resistance. If it has loosened, go back the other way. Marking your starting point with a pencil first means a wrong guess costs you nothing.
Do I need a special tool to adjust uPVC door hinges?
Often a hex key is enough, but several 3D hinge patterns need the manufacturer's own tool. Take the cap off and look at the adjuster before you start, because forcing the wrong key will round it off and turn an adjustment into a replacement.
Can adjusting the hinges stop a draught?
Yes, if the draught is on the hinge side and the door isn't pulling evenly onto its seal. Increase compression a quarter turn at a time until the door meets the seal along that edge. A draught on the lock side is a different matter: that edge is pulled in by the multipoint locking points meeting their keeps, so the hinges won't help. And if the seal itself has hardened or flattened, no amount of adjustment will fix it and the seal needs replacing.
What is toe-and-heeling?
Toe-and-heeling is the process of repacking the glass unit inside a uPVC door or window sash so the glass braces the frame back into square. The beads come off, the packers are repositioned at the corners, and the rigidity of the sealed unit holds the sash true. It's the standard repair for a glazed uPVC door that has dropped beyond what the hinges can adjust out.
Recent Posts
-

Window Sealant or Window Seal? What's Gone Wrong | GB DIY
If you have been looking for how to replace window sealant, there is a fair chance the part you need …6th Oct 2026 -
Types of uPVC Door Hinges: How to Identify Yours
Working out the type of uPVC door hinges you have is the job standing between you and a repair that …10th Sep 2026 -
How to Measure Window Hinges and Friction Stays
Knowing how to measure window hinges properly is the difference between a stay that drops straight i …10th Sep 2026